If you are coming here to check out the winners or accept your
VERSATILE BLOGGER AWARD please click
HERE
If you are here for the BACK TO SCHOOL BLOG HOP please click
HERE for the BACK TO SCHOOL BLOG HOP DAY #1
HERE for the BACK TO SCHOOL BLOG HOP DAY #2
HERE for the BACK TO SCHOOL BLOG HOP DAY #3
BE SURE TO follow ALL of the directions for EACH DAY and COMMENT ON EACH DAY IN ORDER TO WIN THE BLOG CANDY... I would HATE to not have to send it to anyone and I KNOW the USPS REALLY wants the business! LOL The question for today is, do you have any questions for me? I have received a few from you throughout the blog hop and I will post the answers this week depending on when my boys are feeling better and figured I would open it up if anyone else had some:) If you don't, that's OK TOO :P
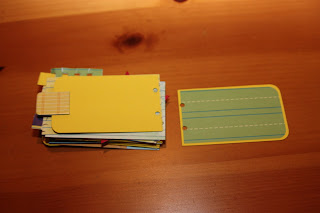
I had originally planned on finishing a canvas scrapbook or wall art for my last and final project-I got a little carried away the last few days with extra projects and figured today would be a great day to make my last but not least project.. Well, as it turns out, I had to meet with a client today, I have one sick one and one REALLY sick one with a fever and time just got away from me. I figured I ended up putting out more projects than I was asked to so far anyway so I hope you FORGIVE ME :) I asked my youngest what should I do because I needed to create something but my oldest wanted to snuggle with me and when your 13 year wants to snuggle.. YOU STOP AND DO IT because before long... he may not want to. Soooooo, my awesome 11 year old said what about a clip? So this is what I came up with... Another REALLY great gift that would go great with the previous project of the composition books... and SUPER DUPER easy AND FAST.. which is EXACTLY what the doctor ordered..lol

So for the larger one, I took one of the pre-made sayings from the Bo Bunny paper and cut it out, matted it twice and then took the same paper that was used as the bottom mat and put it on the other side of the clip so the clip is sandwiched in between the triple matted set of papers and the one paper. I used Beacon 3 in 1 glue and pop dots to be sure it was secure and let it dry over night. Beacon glue dries quickly but it isn't worth the chance that it MAY be wet and ruin the project. The clip I used is a large paperclip (approximate 3"-4") that you can purchase from an office supply store or if you are me, you go in your stash :)
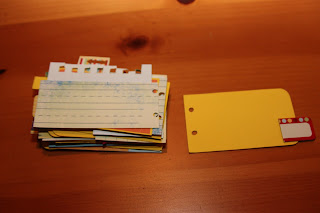
As if that wasn't easy enough this is even EASIER! It's also a great project for kids to make for Grandparent gifts for holidays and you can even use a picture in the middle of the clip instead of a decorative paper and it makes it even all that much more personal :) Just remember it doesn't matter what shape you use-flower, heart, circle, square, label, etc. it all works!

So, I took two circle punches (1 1/4" & 1 3/8" and you could use any size really) punched out two of each size (one set for the front & for the back.) I put the one circle and matted it to the larger circle and repeated for the second set. I took pop dots, placed them in a u shape to surround the paper clip, used beacon glue to secure the clip and let dry over night. That's it... and what a wonderful gift for a new reader!!!
It has been a wonderful blog hop & I really appreciate each & every comment that you have left! A SUPER DUPER THANK YOU 2 REBEKAH & all of her hard work getting this blog hop rolling-U ROCK!
Have a wonderful day and thanks for taking the time to visit me!
And as always, make today and every day
A CREATIVE JOURNEY :)
With Love & Creativity,
Melissa